Your 3D printer is capable of doing amazing things. Despite 3D printing being a productive and enjoyable activity, it can be less than optimal sometimes when it gives up and you spend hours to troubleshoot the problems but still all in vain.
Here are some 3D printing problems, with the names they’re commonly referred to by the industry. We have provided some fixes to help troubleshoot them within minutes instead of hours. All 3d printers will most likely face some of these problems at some point along the way.
Clogged Nozzle
When you have completed all the preliminaries, set the correct temperature, calibrate the bed and start to print something and nothing comes out of the nozzle, the first likelihood is that the nozzle is clogged. This usual happens because some residue from previous print jobs is stuck inside.
Another reason can be that you left inside a small amount of filament while changing the spools. Sometimes the filament snaps near the tip of the nozzle. When you try to load another filament spool the old one jams the nozzle up and does not let the new filament to get through.
How to fix it
The easiest way to fix this is by using a needle or a small diameter, soft metal wire that is rigid and will not droop. Some printers come with special pins that is specifically design for this. Special nozzle cleaning kits can also be bought from places like amazon.
To unclog the nozzle, toggle the printer control menu. Find the temperature setting, heat up the nozzle at the temperature suitable for material you’re current working with, normally at 200 degrees. Now clean the nozzle with the needle, or any other soft metal wire that fits the nozzle. Do not use a sharp or hard wire because it may harm the inner metal interior of the nozzle in the form of scratches.
Oozing or Stringing
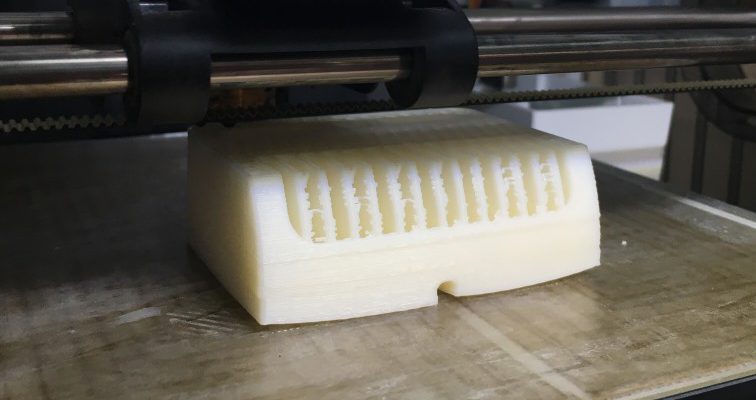
Sometimes the printer leaves unwanted hairs or strings of plastic when we move between different locations on the prints. They often refer to those unsightly hairs as strings. This is common problem resulting from plastic overflow when the extruder moves to another area.
How to fix it
Before the head moves, retract the filament back in the nozzle. The retraction setting can be enabled from Cura, or whatever slicing software you are using. This will restrict the filament from leaking or dripping when the head moves. You can reduce the minimum travel in case the retraction is not fixing it. Reducing travel speed is the best and quickest fix. Moreover, lowering the temperature can also work for it. This is how stringing can be prevented easily.
Warping
Warping in 3D printing means the
shrinkage of material that lets the sides of the model being printed to lift
upwards and withdraw from the build plate. Horizontal cracks can also occur in
the upper layer of the model being printed. The plastic first expands and then
it contracts when it cools down. If it is contracted to high extent, it can
lead the print to lift up from the build plate.
How to fix It
Make sure that your prints adhere well to the build plate. Without proper adhesion, parts of the object can become loose and disengage with build surface. The disengage portion will drop in temperature and eventual warp.
Check if the build plate is leveled accurately. Ensure that the distance between the nozzle and build plate is appropriate. Keep the surface clean and free from grease to make sure that the prints adhere well.
If you are using a heated plate, then you can use an adhesive so that the print sticks very well. Another reason why you are seeing warping is because of cooling and you can overcome this by using heated plates or disabling cooling. These are some quick fixes that you can use to overcome warping.
Pillowing
When the top layer of the print
isn’t completely fastened, and you see bumps somewhere on the surface. This
kind of problem is known as pillowing. Such deformities usually appear due to
wrong printer settings or inappropriate cooling. You can easily get rid of
pillowing by just applying some simple fixes.
How to Fix It
Use a thick enough top layer for the print to even things up. Otherwise too thin of a top layer can lead to pillowing and holes.
The second thing is to use proper cooling. Despite good settings, if cooling is not good enough, then you may see pillowing. You can easily control this by making sure that the head fans are running on the maximum fan speed.
Sometimes, lowering the print temperature can also help to avoid bumps and
getting a smooth surface. However, if your print already started extruding,
then it will be useless to lower the print temperature.
Cracks or Scars on Surface
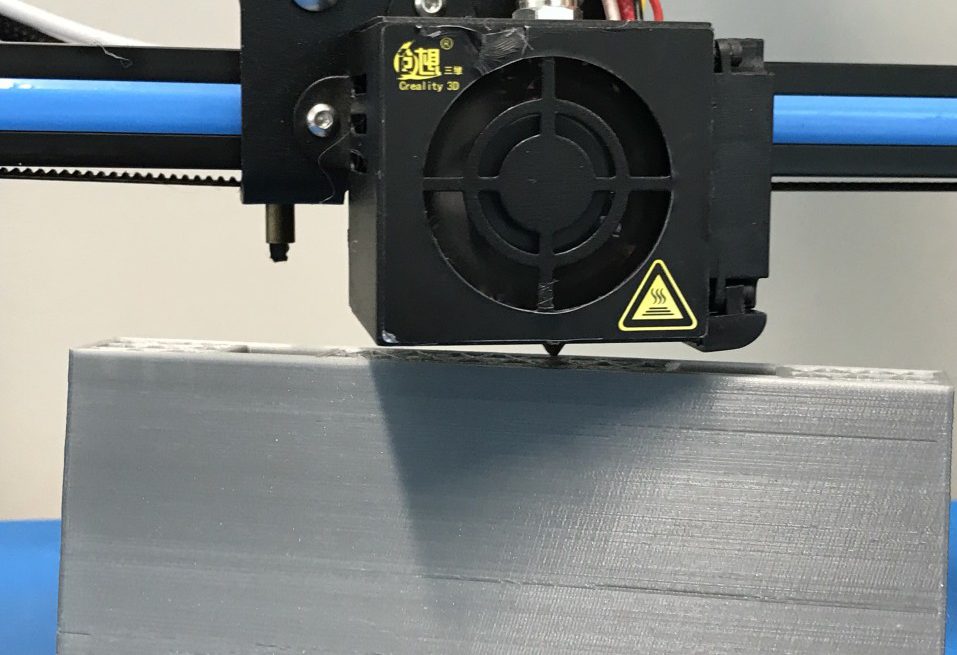
A common issue in 3D printing is cracking. Cracks are easily visible on the edges and upper layers of prints. The elevated temperatures of the built environment will slow down the cooling of the part. However, interlayer stresses are not caused by part cooling in itself. They are caused by temperature gradients which lead to uneven part cooling. That is why you will still get some cracking within non-controlled enclosures.
How to Fix It
The hot end temperatures can be seen from the printer controls interface. Try adjusting the temperature of the extruder. Slightly increase its temperature to about 10 degrees Celsius. Then use trial and error. Hopefully, it will work.
In case it doesn’t work, check the fan speed and direction. Adjust it if necessary. Try reducing the speed of the fan and the direction should be direct away from the upmost section the model. Check the fan speed and direction two to three times just to make sure that they are working properly.
Missing parts of object
A common issue in 3D printing is that it leaves out small parts of a model during printing. Suppose your printer has a large diameter nozzle. It works well for bigger parts but not for in-depth detail parts and thus misses some details of the model. Another reason can be, while printing too quickly, it leaves a blister or blob in the intended shape but does not cover the detailed features.
How to fix it
For small sized or detailed prints, try installing a small sized nozzle. For quick printing problems, slow down the speed and print only two to three parts of the model together. It can take slightly longer than usual because of the minimum time condition.
Under-Extrusion
Under Extrusion occurs when the printer doesn’t supply the right amount of material. If you see missing layers, very thin layer or layers with holes and random dots in them, then it means that the printer is not extruding the correct amount of material. Referred to as under extrusion. This problem is a bit difficult to find because there are many variables to consider that could cause this problem. But that doesn’t mean it can’t be solved.
How to fix It
If your printer is under extruding, then the first thing you should check is if it has a sufficient amount of material. Or if the martial being used is matching the material settings of the printer.
The second thing you should check is that the feeder is working correctly as it is responsible for providing the material to the printer.
After the material is passed through the feeder, you should check the Bowden tube. If it is experiencing some kind of friction, then it may be causing under extrusion. Find the thing that is causing friction in the tube and problem solved.
Vibrations
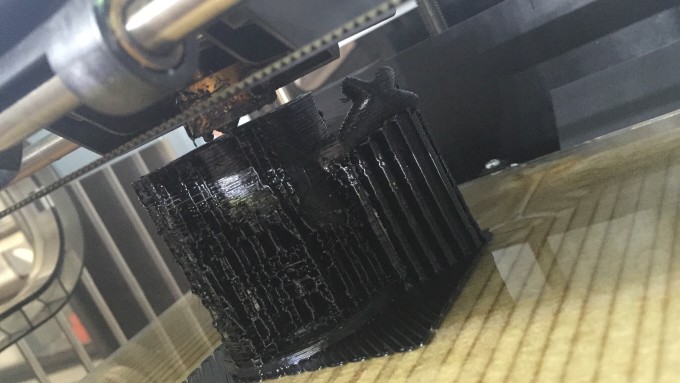
Ringing or vibrations are the unusual pattern or repetition of lines that can appear on the upper layer of a print. It usually happens when the extruder suddenly changes its direction.
How to fix it
If the printer moves too fast, then sometimes there may be the appearance of ringing in printing. For this, reduce the speed of the printer. These fast movements of the printer create an extra inertial force that creates vibrating artifacts in prints.
If the printer still produces vibrations after reducing the speed, then check for mechanical issues. Mechanical issues are a big cause of vibrations and ringing in prints. Look for broken brackets, loose screw or nuts. Do so while the printer is off and has cease all movements to avoid any accidents. You will definitely find where the ringing is occurring.
Bad infill
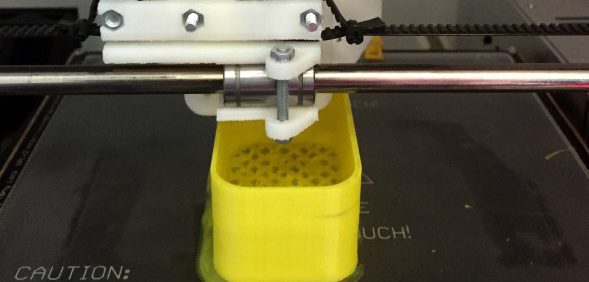
Sometimes the inner shells of the 3D model are not properly filled. Each part of the 3D print is important, but the inner ribs are of high significance because it has the overall support strength of the print. It can occur that the infill is so weak that it cannot support the outer shells causing an overall weak print.
How to fix it
You can adjust the speed at which the infill prints. Reducing the speed works well for this.
Try changing the infill pattern in your print profile. This is done via the slicer software. Each pattern has different angles. Choose one according to the current fill design requirement. Hopefully, that works for you.
If you still face the same problem of poor infill, then modification of the width of extrusion will go well. Set a higher value for the width for that particular part that will surely work.
Closing note
As common with most mechanical equipment with many moving parts, many opportunities exist for there to be some sort of malfunction. Most of the issues require little skill to resolve.
Industrial machines are usually more expensive, better built, and have expert staff setting them up and maintaining them. Beginners could learn how to completely avoid these mistakes after a while.
After experiencing an issue first hand and realizing the problem and solution, the next potential issue as well the entire system will become clear. After all, doing is the best well way to learn. But if nothing works, it’s time to call in the experts.
Other resources for troubleshooting help
Most manufactures offer technical supports to deal such issues. You can typically get access to support from the manufacture via their website or a phone number on their site. A quick google search will pull up everything you need.
Some other troubleshooting guides we’ve found to be helpful are:
- The ultimate troubleshooting guide by rigid.ink. It covers most of the issues you would ever face: https://rigid.ink/pages/ultimate-troubleshooting-guide
- A great guide for troubleshooting print quality is one published by simplified3D: https://www.simplify3d.com/support/print-quality-troubleshooting/
There are also huge 3D printing communities scattered through the web where anyone can ask questions and get help with their 3d printing problems, discuss upgrades, designs, current projects, finished projects, collaborate etc.
Some of the 3D printing communities we recommend are:
- General 3D printing community on reddit: https://www.reddit.com/r/3Dprinting/
- Functional 3D printing community on reddit: https://www.reddit.com/r/functionalprint/
- 3D printing forum: https://3dprintboard.com/


